이번에는 ionic cordova fcm을 세팅과 플러그인 설치 그리로 ionic-fcm 사용방법을 설명하고자 한다.
1. firebase에서 fcm생성
firebase사이트에서 아래 사진처럼 "android"를 선택한다.
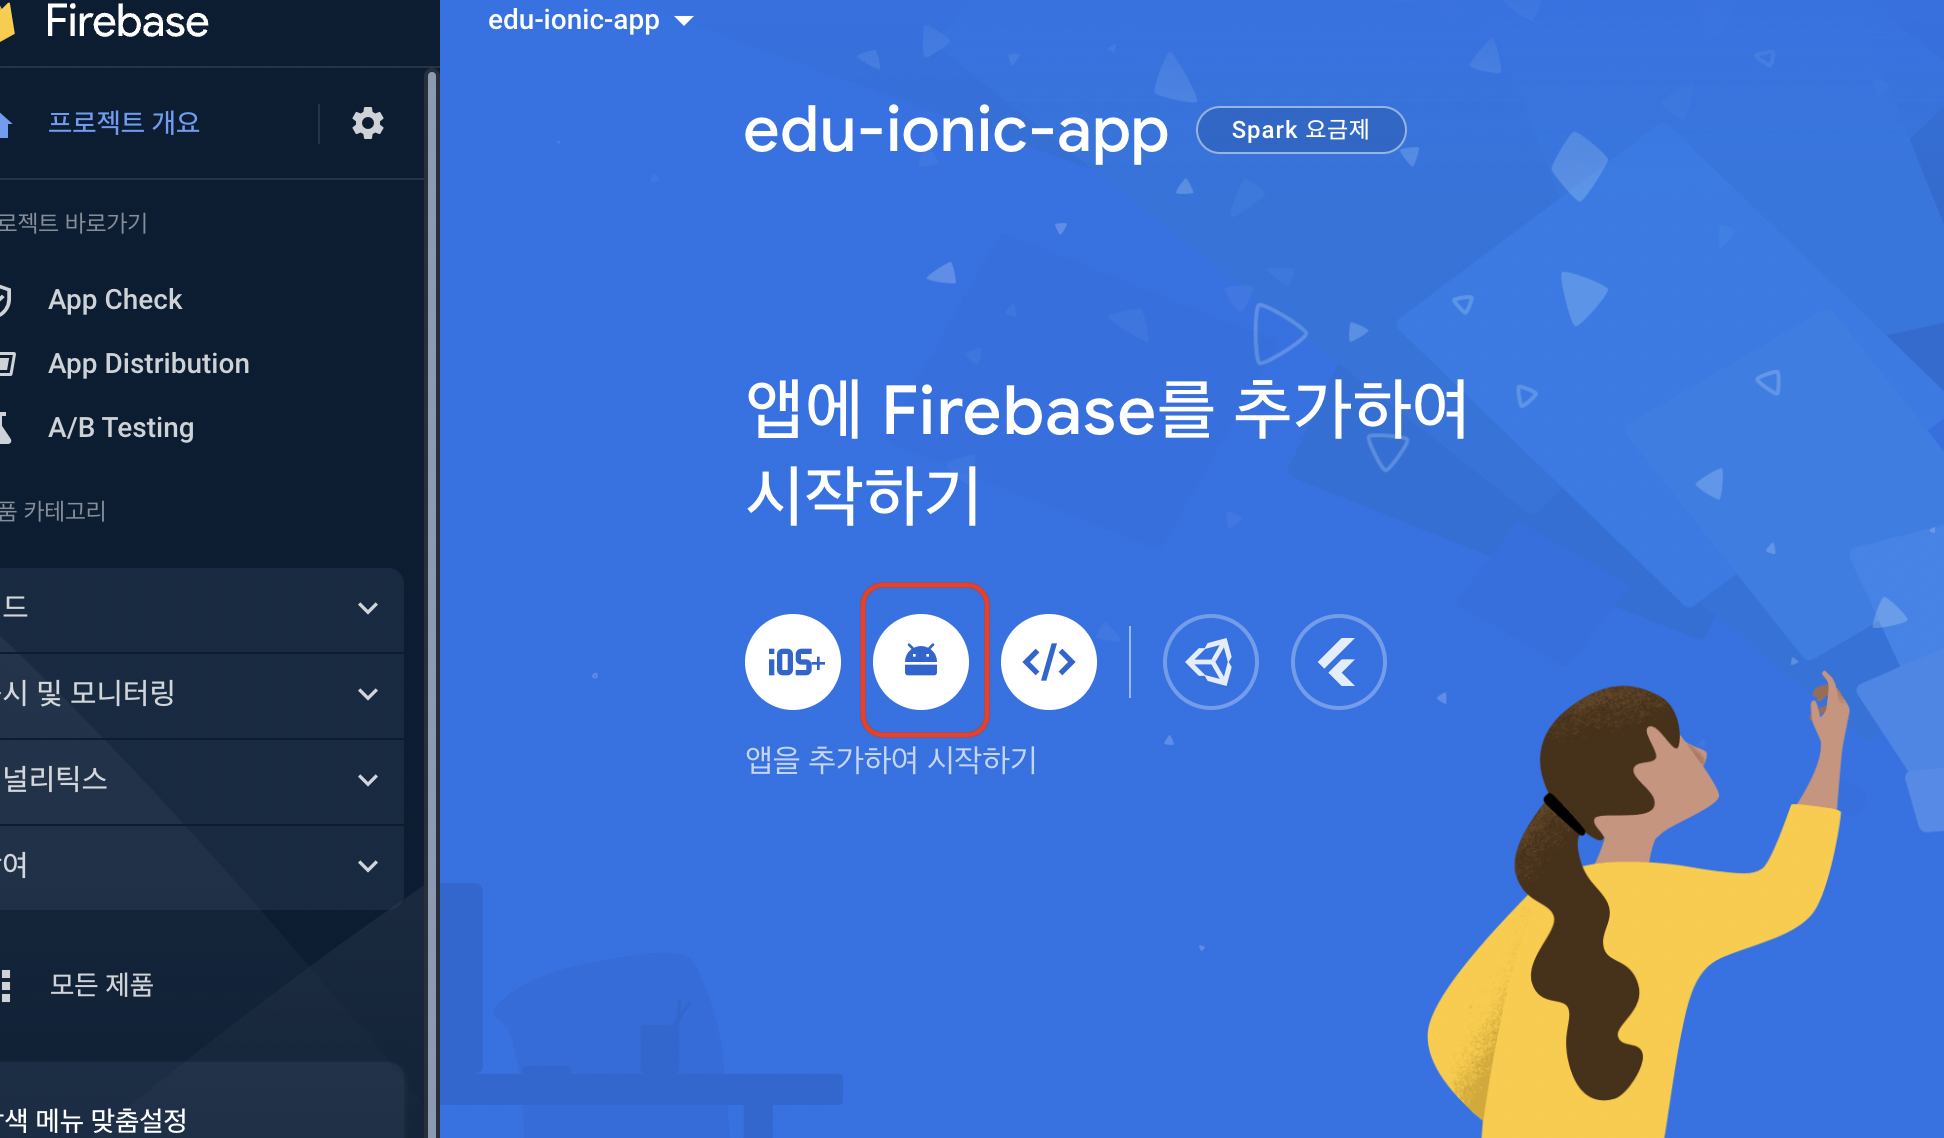
2. android 생성
패키지이름은 해당 앱의 패키지명을 입력하고,
디버그 서명 인증서 같은 경우는 아래 명령어를 통해 얻을 수 있다.
keytool -list -v -keystore ~/.android/debug.keystore -alias androiddebugkey -storepass android -keypass android
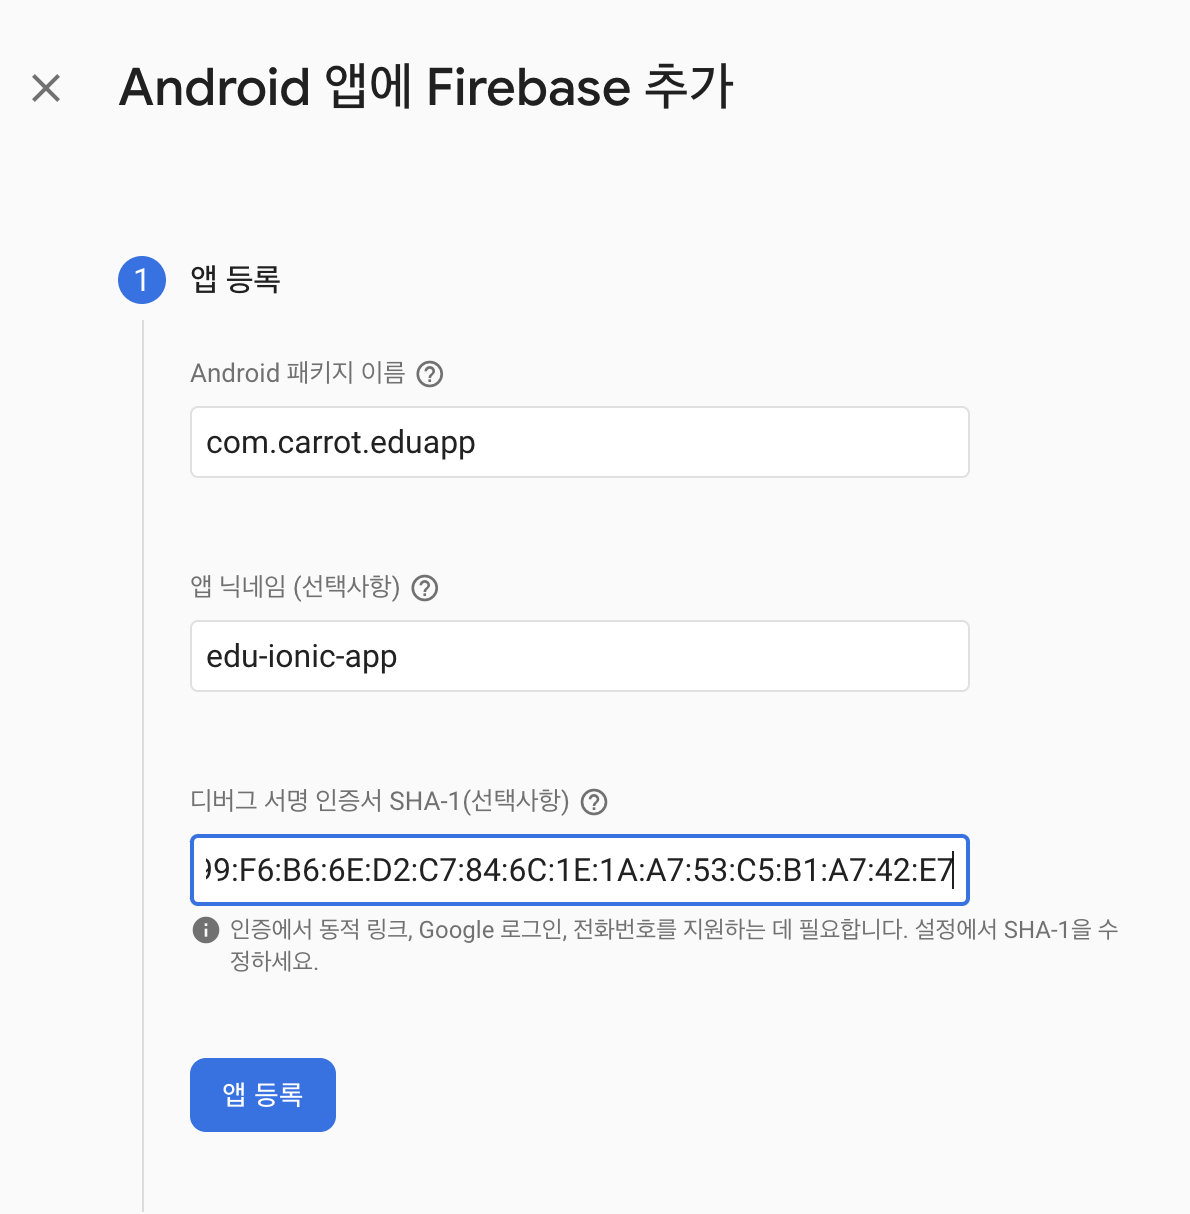
3. google-servies.json 다운로드 및 루트폴더 이동
생성완료가 되었다며, 아래 사진처럼 google-services.json을 다운받는다.
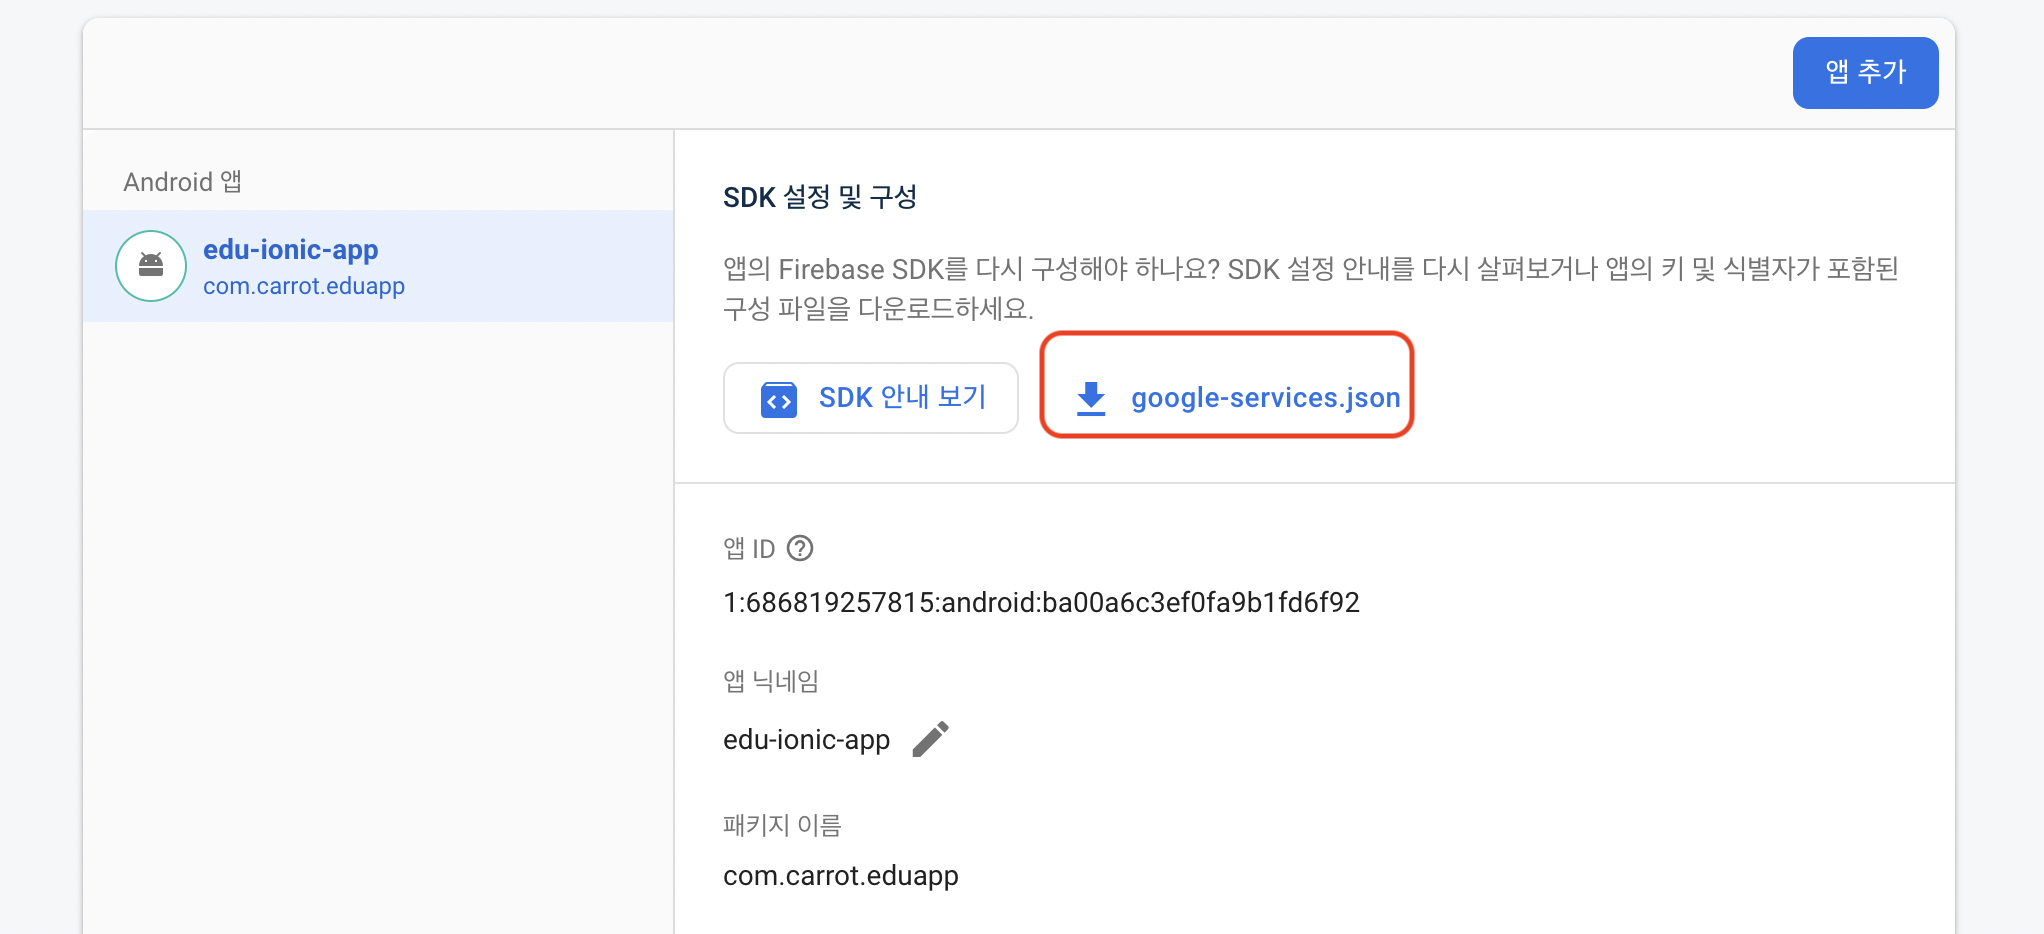
그리고 프로젝트 root폴더로 이동시킨다.
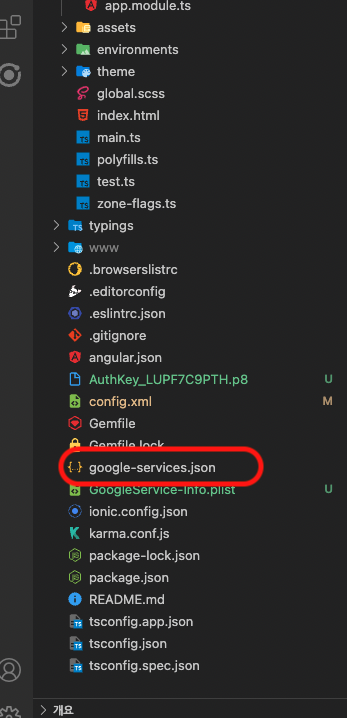
4. plugin 설치
현재시점 기준으로는 https://github.com/andrehtissot/cordova-plugin-fcm-with-dependecy-updated 를 다운받고 target sdk를 31으로 바꿀 경우 오류가 난다.
그러므로 아래 명령어를 통해 설치하도록 하자
ionic cordova plugin add https://github.com/marutifh/cordova-plugin-fcm-with-dependecy-updated그리고 ionic fcm 플러그인만으로는 foreground에서 알림이 도착하지 않으므로 local-notifications 설치하자
ionic cordova plugin add https://github.com/fquirin/cordova-plugin-local-notifications.git --save --noregisterynpm install @awesome-cordova-plugins/local-notifications
5. app.module.ts 플러그인추가
//app.module.ts
//FCM
import { FCM } from 'cordova-plugin-fcm-with-dependecy-updated/ionic/ngx';

//LocalNotifcications
import { LocalNotifications } from '@awesome-cordova-plugins/local-notifications/ngx';

@NgModule({
	providers: [
            .
            .
            .
            FCM,
            LocalNotifications,
  	],
})
6. 푸시 알림 사용해보기
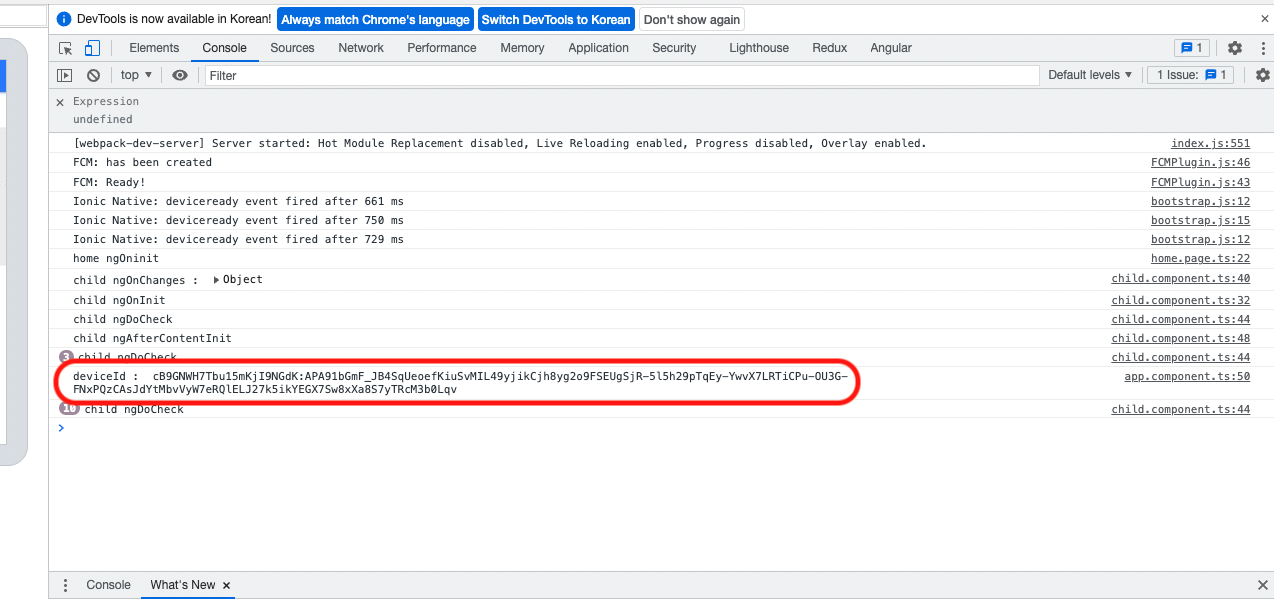
1. getToken으로 부터 token 값 얻기
import { FCM } from 'cordova-plugin-fcm-with-dependecy-updated/ionic/ngx';
import { Platform } from '@ionic/angular';

@Component({
  selector: 'app-root',
  templateUrl: 'app.component.html',
  styleUrls: ['app.component.scss'],
})

export class AppComponent implements OnInit {
	constructor(private fcm: FCM,private platform: Platform){}

    ngOnInit(): void {
    	this.platform.ready().then(async () => {
        	await this.getToken();
        })
    }

    getToken() {
        this.fcm.getToken().then((token) => {
          //token 얻기
          console.log('deviceId : ', token);
        });
    }
}
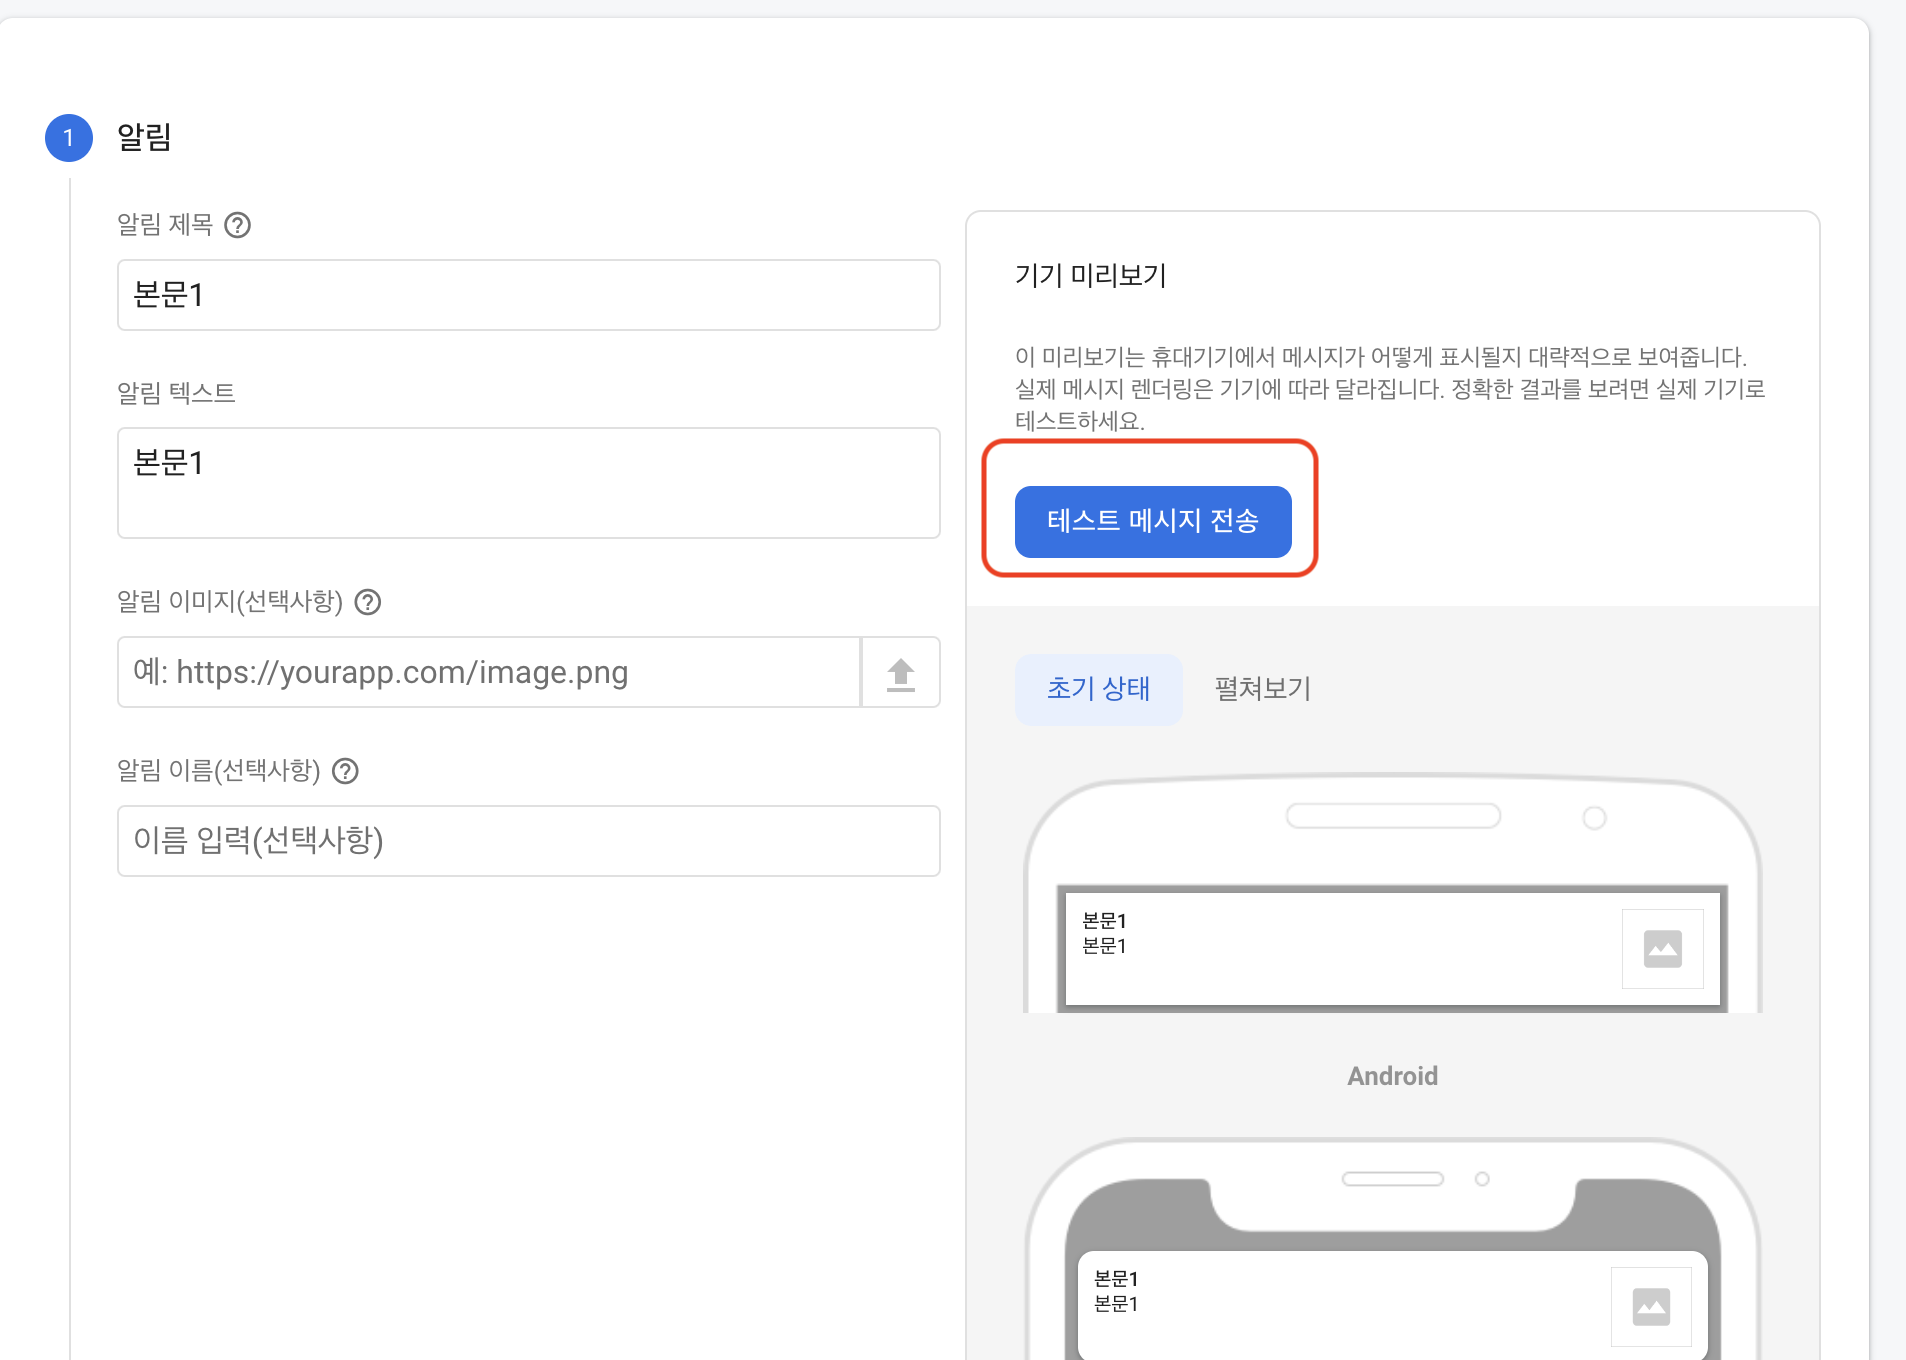
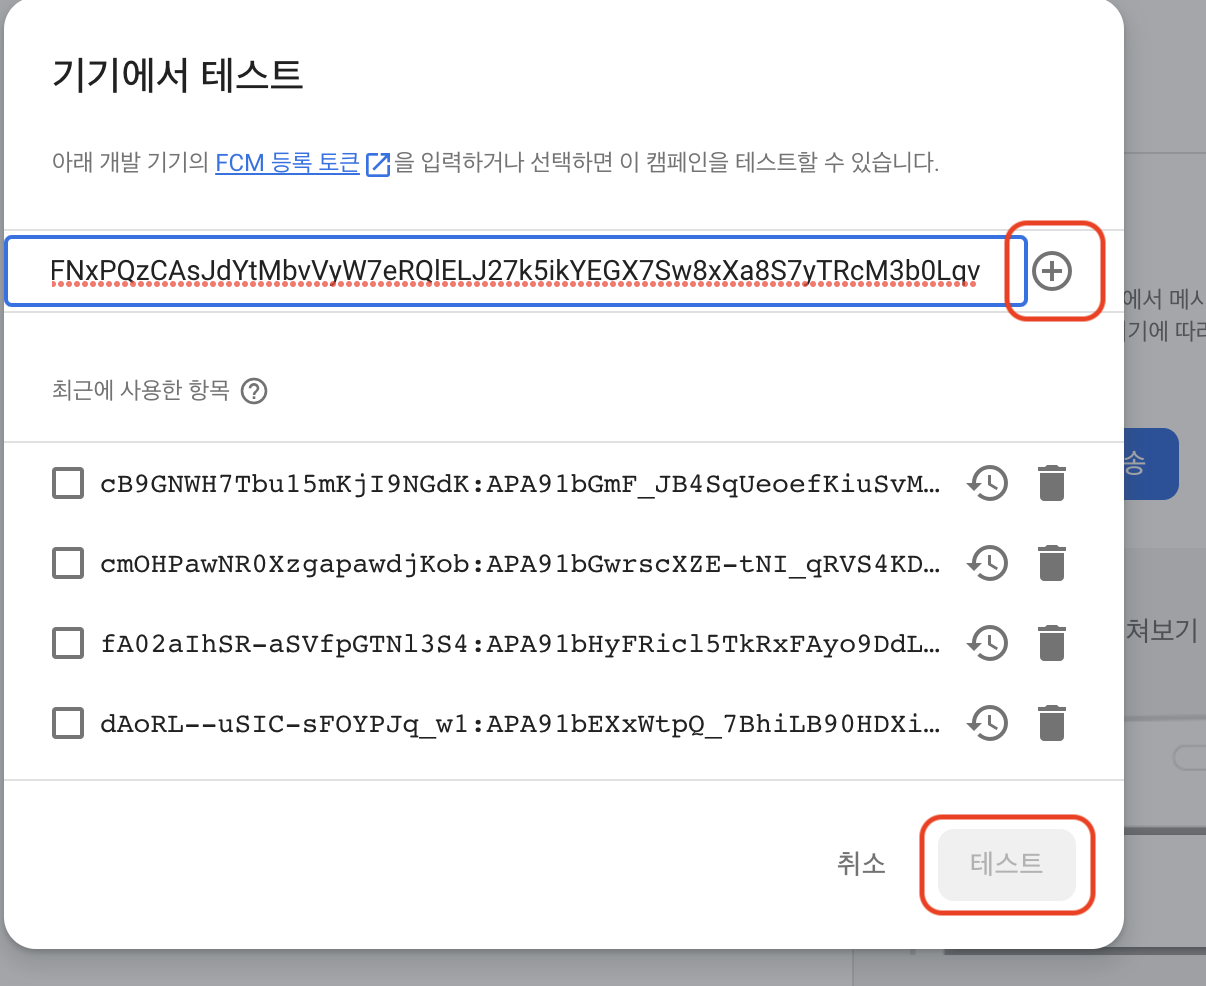
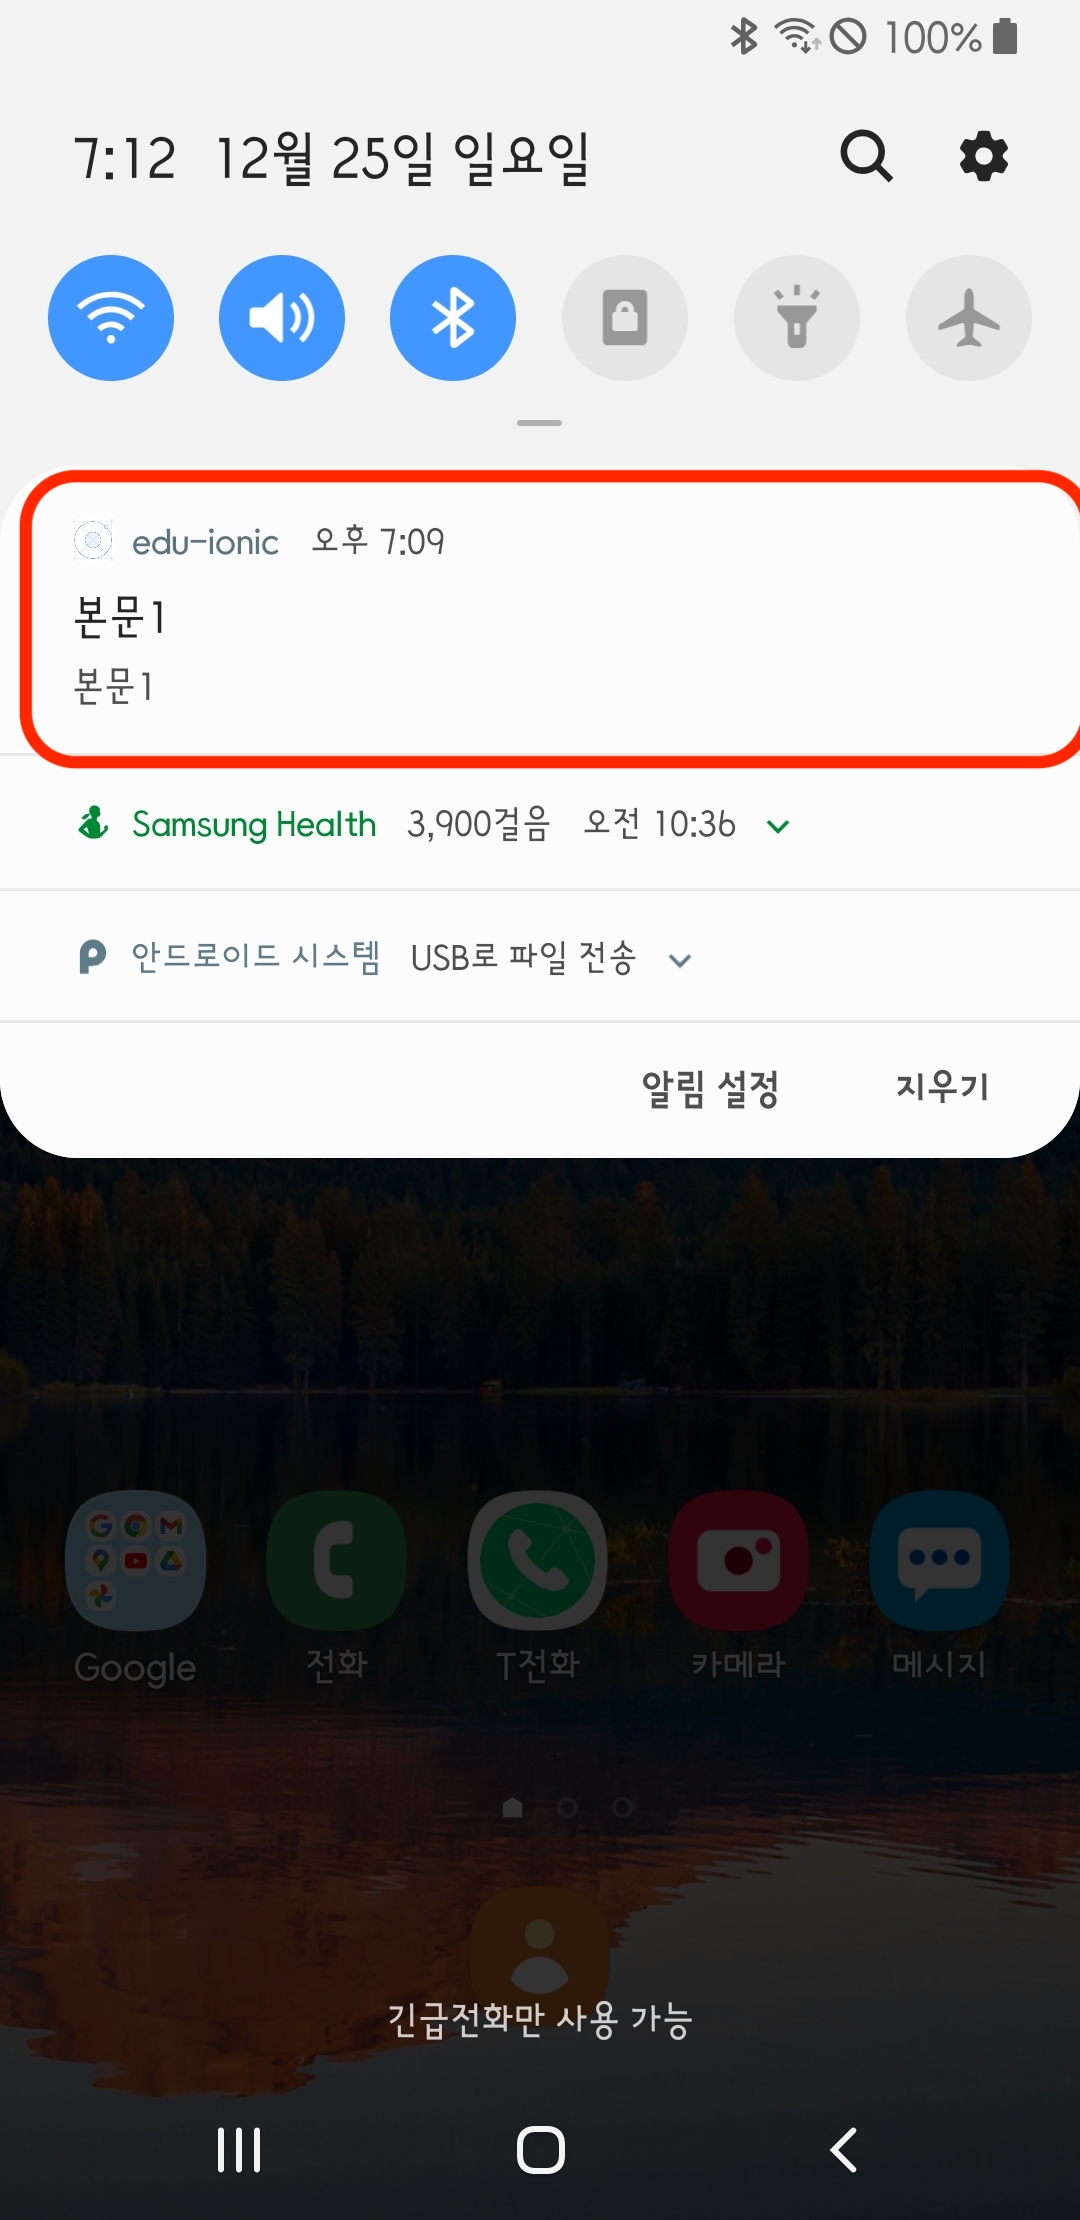
2.위에서 얻은 token으로 firebase에 테스트로 메세지를 전송해본다.
7. foreground에서 동작하게 하기
다만 현재 fcm은 foreground(앱 활성화)에서 알림이 올때 동작을 하지 않는다. 그리하여 localnotificcations와 결합하여 사용해야 한다.
1. getToken함수에서 성공적으로 데이터를 얻을 경우 fcmNoti 함수를 감시(subscribe)한다.
2. fcm이 foreground에서는 알림표시가 뜨지 않기때문에 localnotificatios를 호출하여야 한다.
import { FCM } from 'cordova-plugin-fcm-with-dependecy-updated/ionic/ngx';
import { Platform } from '@ionic/angular';
import { LocalNotifications } from '@awesome-cordova-plugins/local-notifications/ngx';
@Component({
  selector: 'app-root',
  templateUrl: 'app.component.html',
  styleUrls: ['app.component.scss'],
})

export class AppComponent implements OnInit {
	constructor(private fcm: FCM,private platform: Platform, private localNotifications: LocalNotifications){}

    ngOnInit(): void {
    	this.platform.ready().then(async () => {
        	await this.getToken();
        })
    }

    getToken() {
        this.fcm.getToken().then((token) => {
          //token 얻기
          console.log('deviceId : ', token);
          //1.fcm 이벤트 감시
      	  this.fcmOnNoti();
        });
    }

    fcmOnNoti() {
        this.fcm.onNotification().subscribe(
          (data) => {
            //2. fcm에서 받은 데이터 받으면 localnotications 사용
            this.localNoti(data);
          },
          (error) => {
            console.error('fcm onNotification error : ', error);
          }
        );
    }

    localNoti(data) {
        //3.fcm에서 받은 데이터를 localnotificatios 호출
        this.localNotifications.schedule({
          id: 1,
          text: data.body,
          trigger: {
            firstAt: new Date(new Date().getTime() + 1000),
            every: ELocalNotificationTriggerUnit.MINUTE,
          },
          foreground: true,
        });
  	}
}
'ionic' 카테고리의 다른 글
| 📦 ionic android fastlane (0) | 2022.12.18 |
|---|---|
| 🚌 ionic fcm - android 버전 (0) | 2022.10.30 |
| 🤐 ionic live-reload 해보기 (0) | 2022.10.22 |
| 🤠ionic fcm background에서 데이터 받기 (1) | 2022.03.20 |
| Ionic Speech Recognition (0) | 2022.01.01 |


댓글